Weapon gunsmith
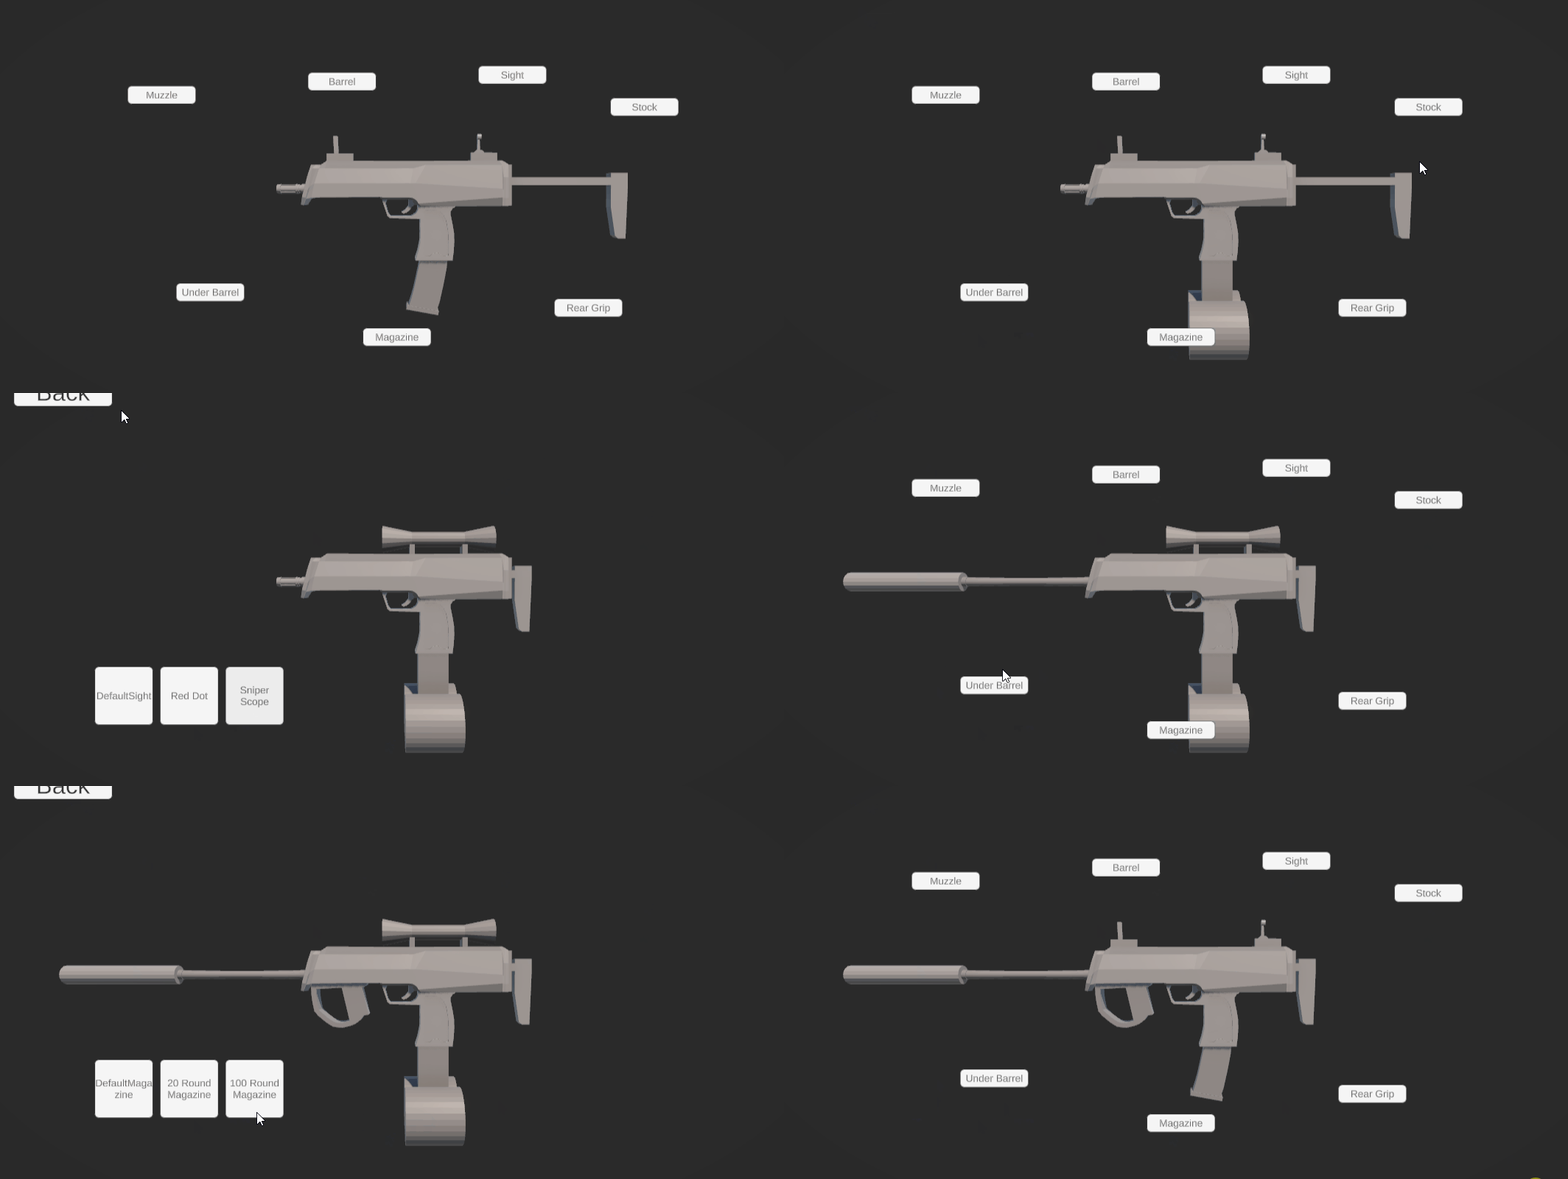
This project is mostly inspired by the gunsmith system from Call of Duty. This system allows you to choose an attachment from a category and when you select the attachment it will be added to the gun. And as result it change how the gun looks
Project details:
code language : C#
Software : Unity engine and GitHub
Team size : Solo
Date : 27 March 2024 Till 09 April 2024
Attachment data
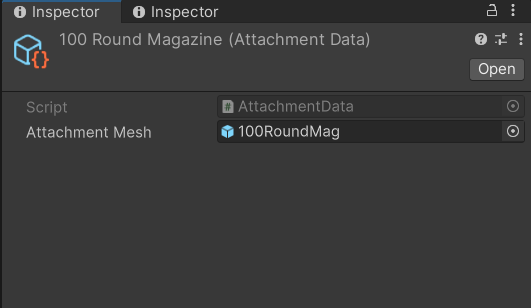
This is a scriptable object where you can store data for an specific attachment. When you create an attachment data object you can select which attachment prefab is linked to this object. Ater that, you can put the attachment data inside a gun attachment data. Now the gun that is linked to the gun attachment data can use this attachment.
For now you can only select the attachment prefab but, you can customize it even further. For example the attachments data can hold stats for that attachment like range, damage or even recoil control.
Gun attachment data
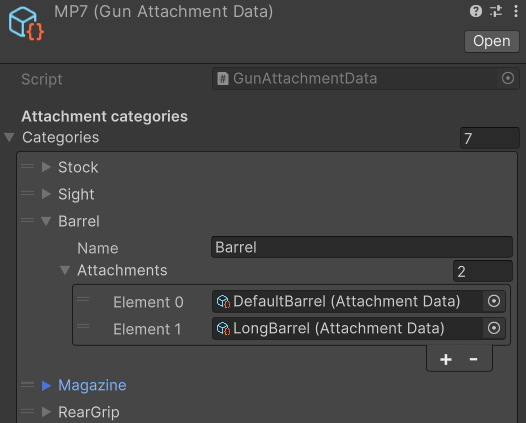
With the gun attachment data you can give the gun attachment categories. Within those categories you can store attachments. For example you have a category named barrels, inside this categories you have all the barrel attachments that this gun can have. Because I use scriptable objects you can easily add or remove attachments from the gun attachment data so it gives you a lot of control.
GunSmith system
Weapon data holder
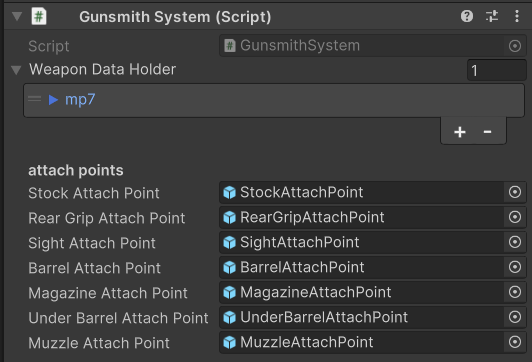
The weapon data holder is a dictionary to save and link the weapon and the gun attachment data. I used an array with a public struct to make the dictionary serializable. The key is the name of the weapon and the value is the gun attachment data you want to link to the weapon.
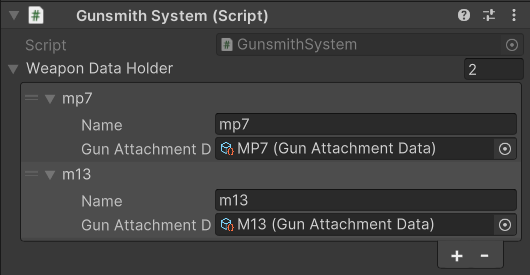
Public struct
[Serializable]

public struct  WeaponDataHolder
{
    public string name; //Key
    public GunAttachmentData gunAttachmentData; //Value
}
Adding the values from the array into the dictionary
private void AddDataToDictionary()
{
    _weaponDataDictionary = new Dictionary<string, GunAttachmentData>();

    foreach (var weaponData in weaponDataHolder)
    {
        _weaponDataDictionary.Add(weaponData.name, weaponData.gunAttachmentData);
    }
}
Attach points
Weapon attach points
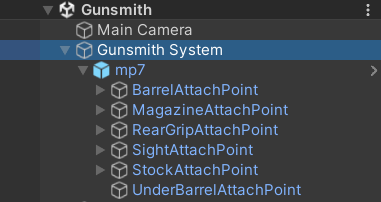
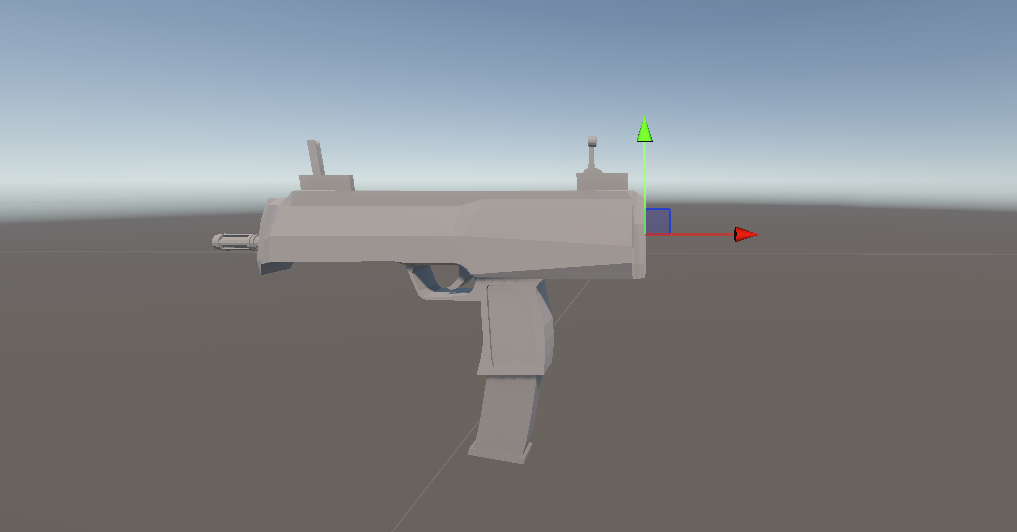
Each weapon has his own attach point for each category. The attach points are set on a specific location on that weapon. As an example the stock attach point is on the back edge of the gun. Because I use attach points for each category I have full control of where the attachment is going to be.
The only thing that was necessary to do to make this work perfectly is that you need to move the pivot point of the attachment to the good place inside Blender.
Muzzle attach point
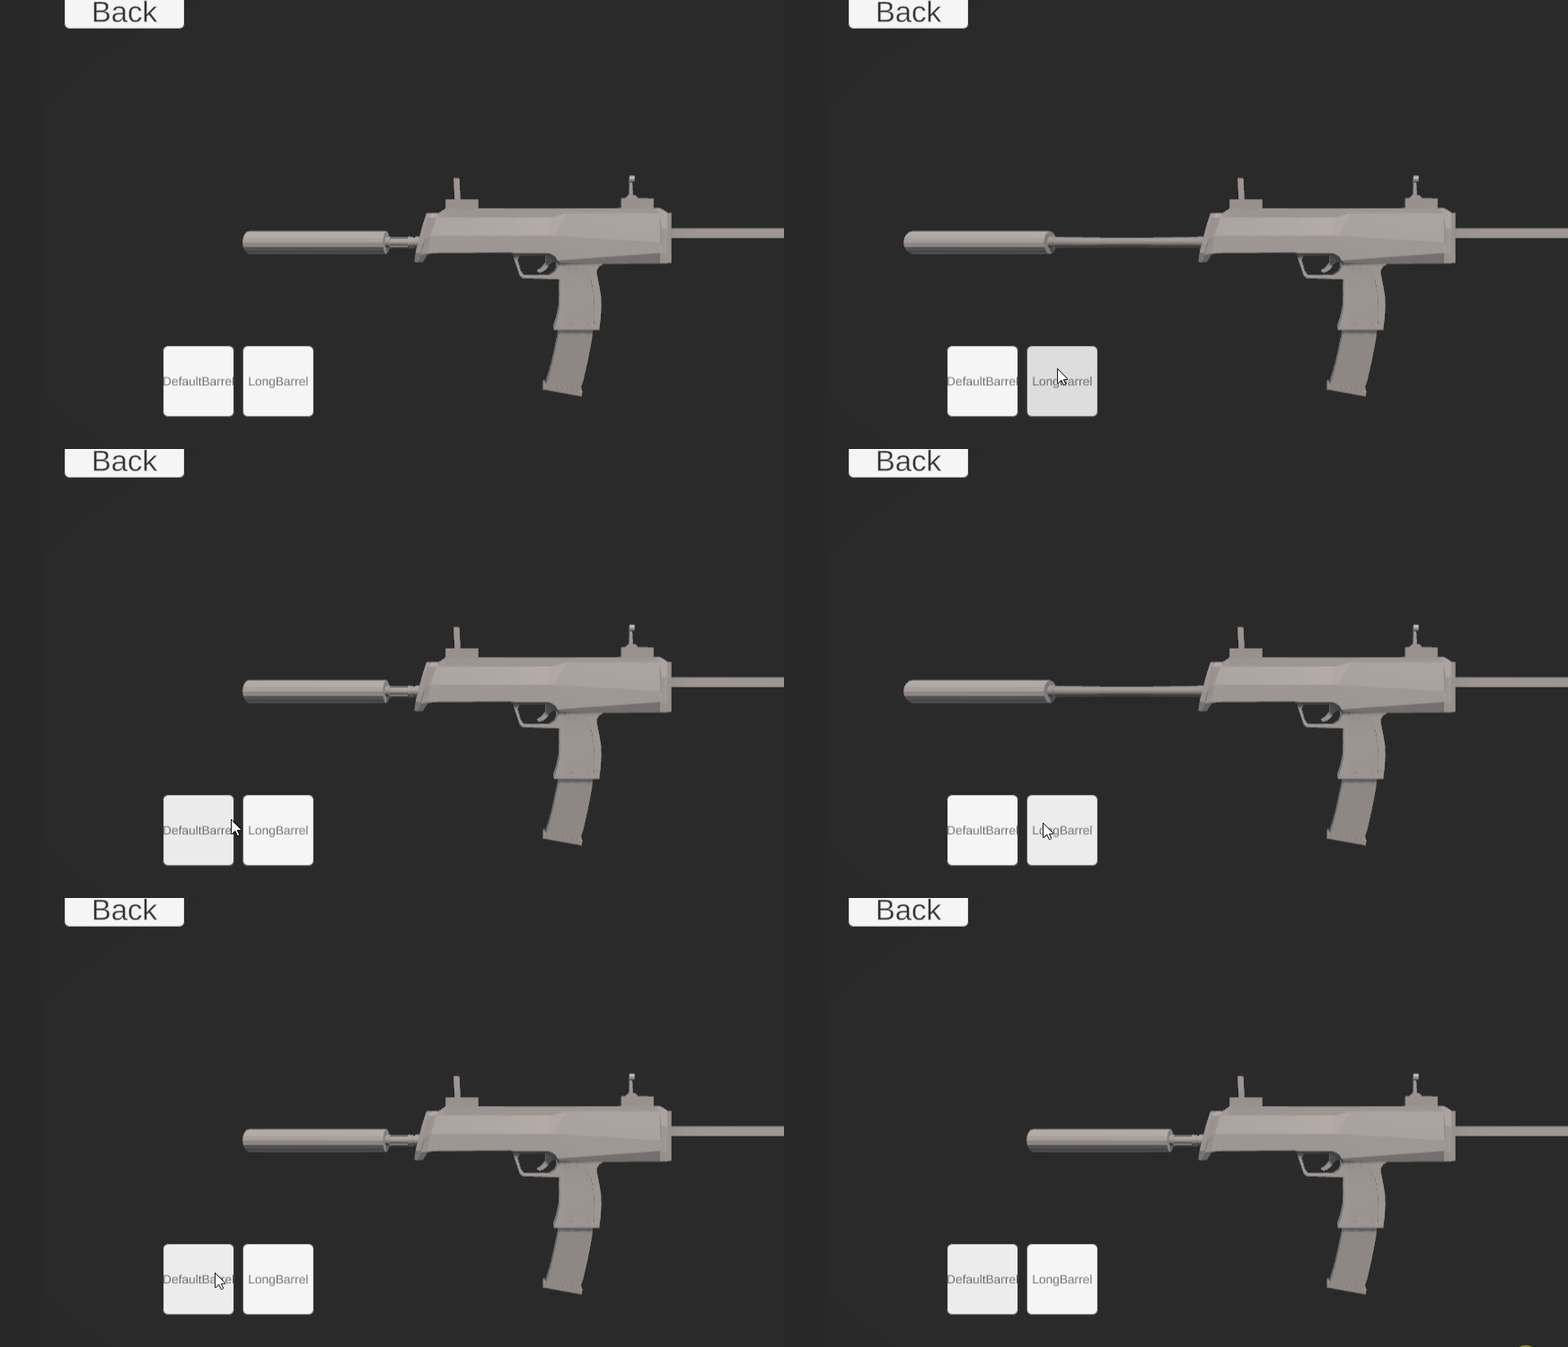
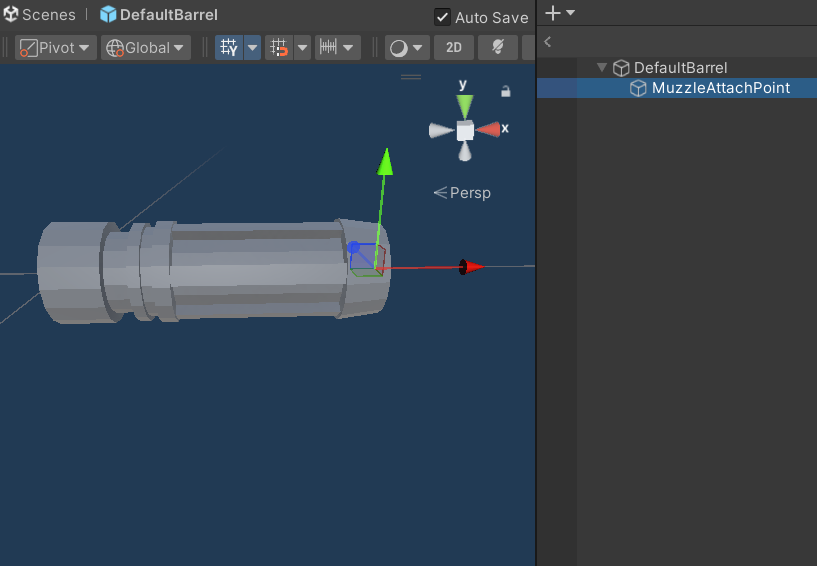
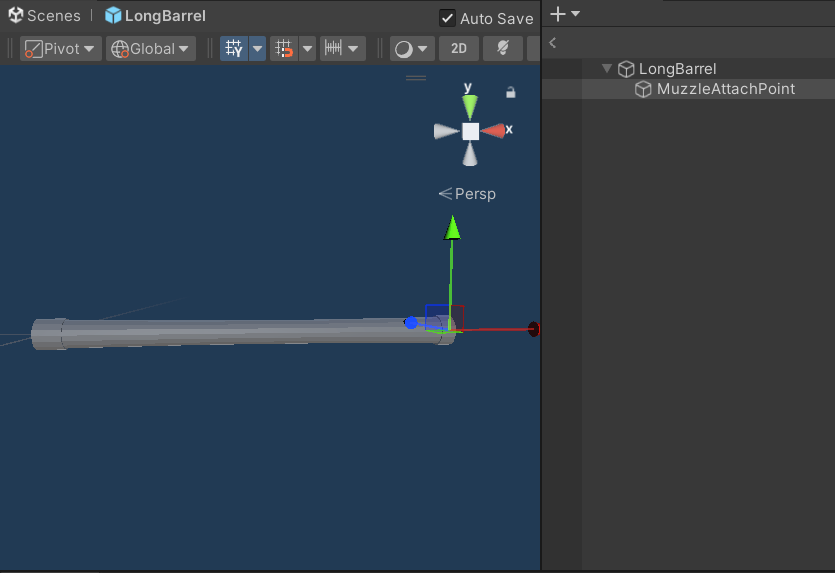
The muzzle attach point work mostly the same, but it is not located under the weapon prefab but under the barrel prefab. Let’s say that you have a small barrel and a suppressor for a muzzle. When you select the long barrel you want the suppressor to be placed at the end of the new barrel.
Each time you select a new barrel it will update the muzzle attach point and if there is an muzzle selected it will destroy the old muzzle and place a new muzzle at the updated muzzle attach point.
Assign the new muzzle attach point
private void UpdateMuzzleAttachPoint(GameObject newBarrel, GameObject muzzle)
{
    muzzleAttachPoint = newBarrel.transform.GetChild(0).gameObject;
    UpdateMuzzleAttachmentLocation(muzzle);
}
Update the muzzle location if there is a muzzle on the gun
private void UpdateMuzzleAttachmentLocation(GameObject muzzle)
{
    if (muzzle == null) return;
    InstantiateNewAttachment(muzzle, muzzleAttachPoint.transform);
}
Returns the muzzle if it is attached to the muzzle attach point
private GameObject GetCurrentMuzzle()
{
    if (muzzleAttachPoint == null || muzzleAttachPoint.transform.childCount <= 0) return null;
    return muzzleAttachPoint.transform.GetChild(0).gameObject;
}
Swapping attachments
When you select an attachment the selected attachment and the category the attachment is from is getting send to the function AttachNewAttachment. The function will use a switch case to confirm the right category and what the right attach point is.
If the right category is selected the system will destroy the old attachment and instantiated the new attachment on the right attach point.
The function that attach the new attachments to the right attach point
public void AttachNewAttachment(GameObject attachment, string category)
{
    category = category.ToUpper();
    switch (category)
    {
        case "STOCK":
            DeleteOldAttachment(stockAttachPoint.transform);
            InstantiateNewAttachment(attachment, stockAttachPoint.transform);
            break;
        case "REARGRIP":
            DeleteOldAttachment(rearGripAttachPoint.transform);
            InstantiateNewAttachment(attachment, rearGripAttachPoint.transform);
            break;
        case "BARREL":
            var currentMuzzle = GetCurrentMuzzle();
            DeleteOldAttachment(barrelAttachPoint.transform);
            var newBarrel = InstantiateNewAttachment(attachment, barrelAttachPoint.transform);
            UpdateMuzzleAttachPoint(newBarrel, currentMuzzle);
            break;
        case "SIGHT":
            DeleteOldAttachment(sightAttachPoint.transform);
            InstantiateNewAttachment(attachment, sightAttachPoint.transform);
            break;
        case "MAGAZINE":
            DeleteOldAttachment(magazineAttachPoint.transform);
            InstantiateNewAttachment(attachment, magazineAttachPoint.transform);
            break;
        case "MUZZLE":
            DeleteOldAttachment(muzzleAttachPoint.transform);
            InstantiateNewAttachment(attachment, muzzleAttachPoint.transform);
            break;
        case "UNDERBARREL":
            DeleteOldAttachment(underBarrelAttachPoint.transform);
            InstantiateNewAttachment(attachment, underBarrelAttachPoint.transform);
            break;
    }
}
Instantiating the new attachment
private static GameObject InstantiateNewAttachment(GameObject newAttachment, Transform targetTransform)
{
    return Instantiate(newAttachment, targetTransform);
}


